Templates allow you to reuse a previously designed project in order to create a similar video for your podcast. Pre-saved and custom templates are available on the Create tab of the Projects Page.
There are two ways to use a template on Headliner.
Quickly adding your audio:
When selecting a template from the create page, you'll be asked if you'd like to quickly add your audio or whether you'd like to use our advanced editor. Selecting Quickly Add Your Audio will take you through a wizard that will allow you to quickly update and export a video using your template.
Open the Advanced Editor:
Selecting Open the Advanced Editor will automatically take you to a new project timeline for your template. From there, you'll be able to customize your video and replace the assets on your template that need to be updated, before exporting your video, by following the steps below.
Step 1: Replace Audio

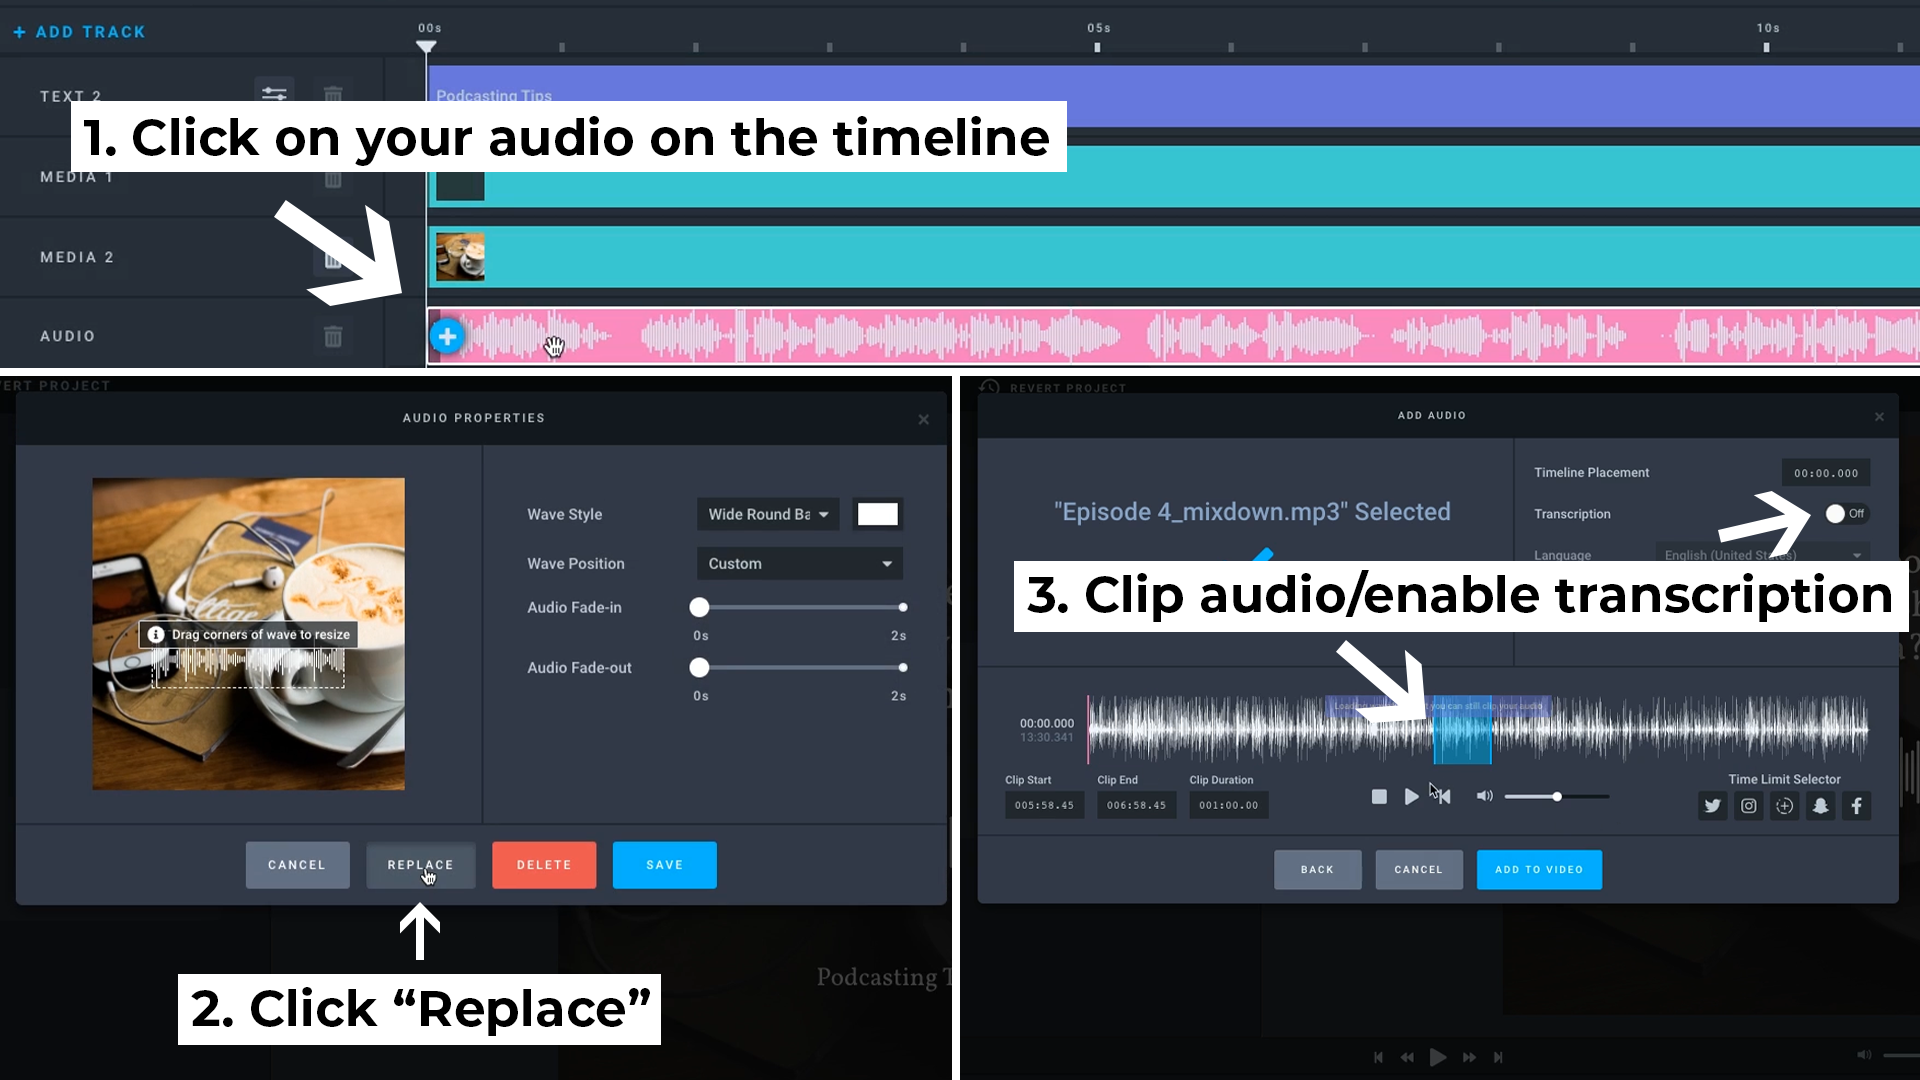
In order to replace your templates audio with audio from your podcast: Click on the pink audio asset on your timeline and hit "replace" in order to upload a new file. Then, clip your audio to the selection you would like to use in your video, enable transcription (optional), and click "add to video."
Step 2: Replace Artwork

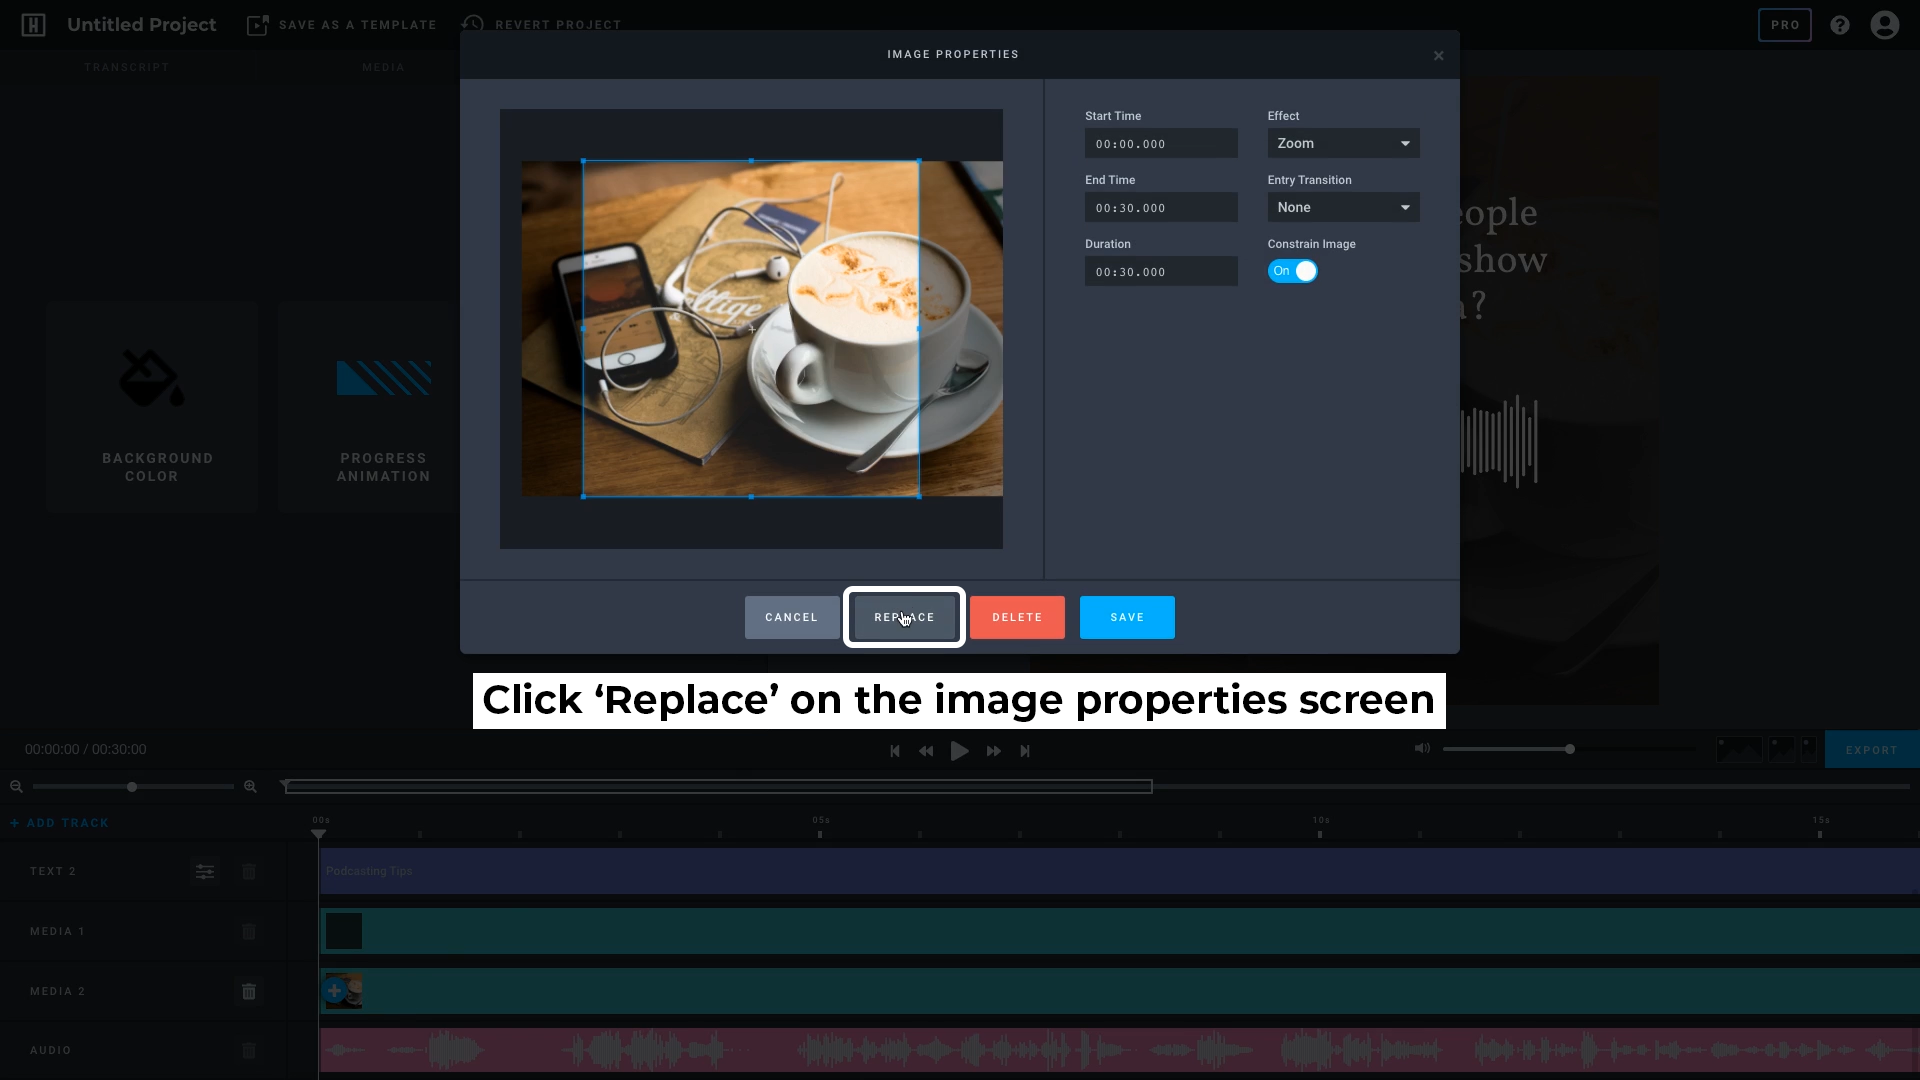
After updating your audio, you may need to update/replace the artwork in your template. To do this: click on your media on the timeline to open the image properties screen and then click "replace."
Step 3: Update Text
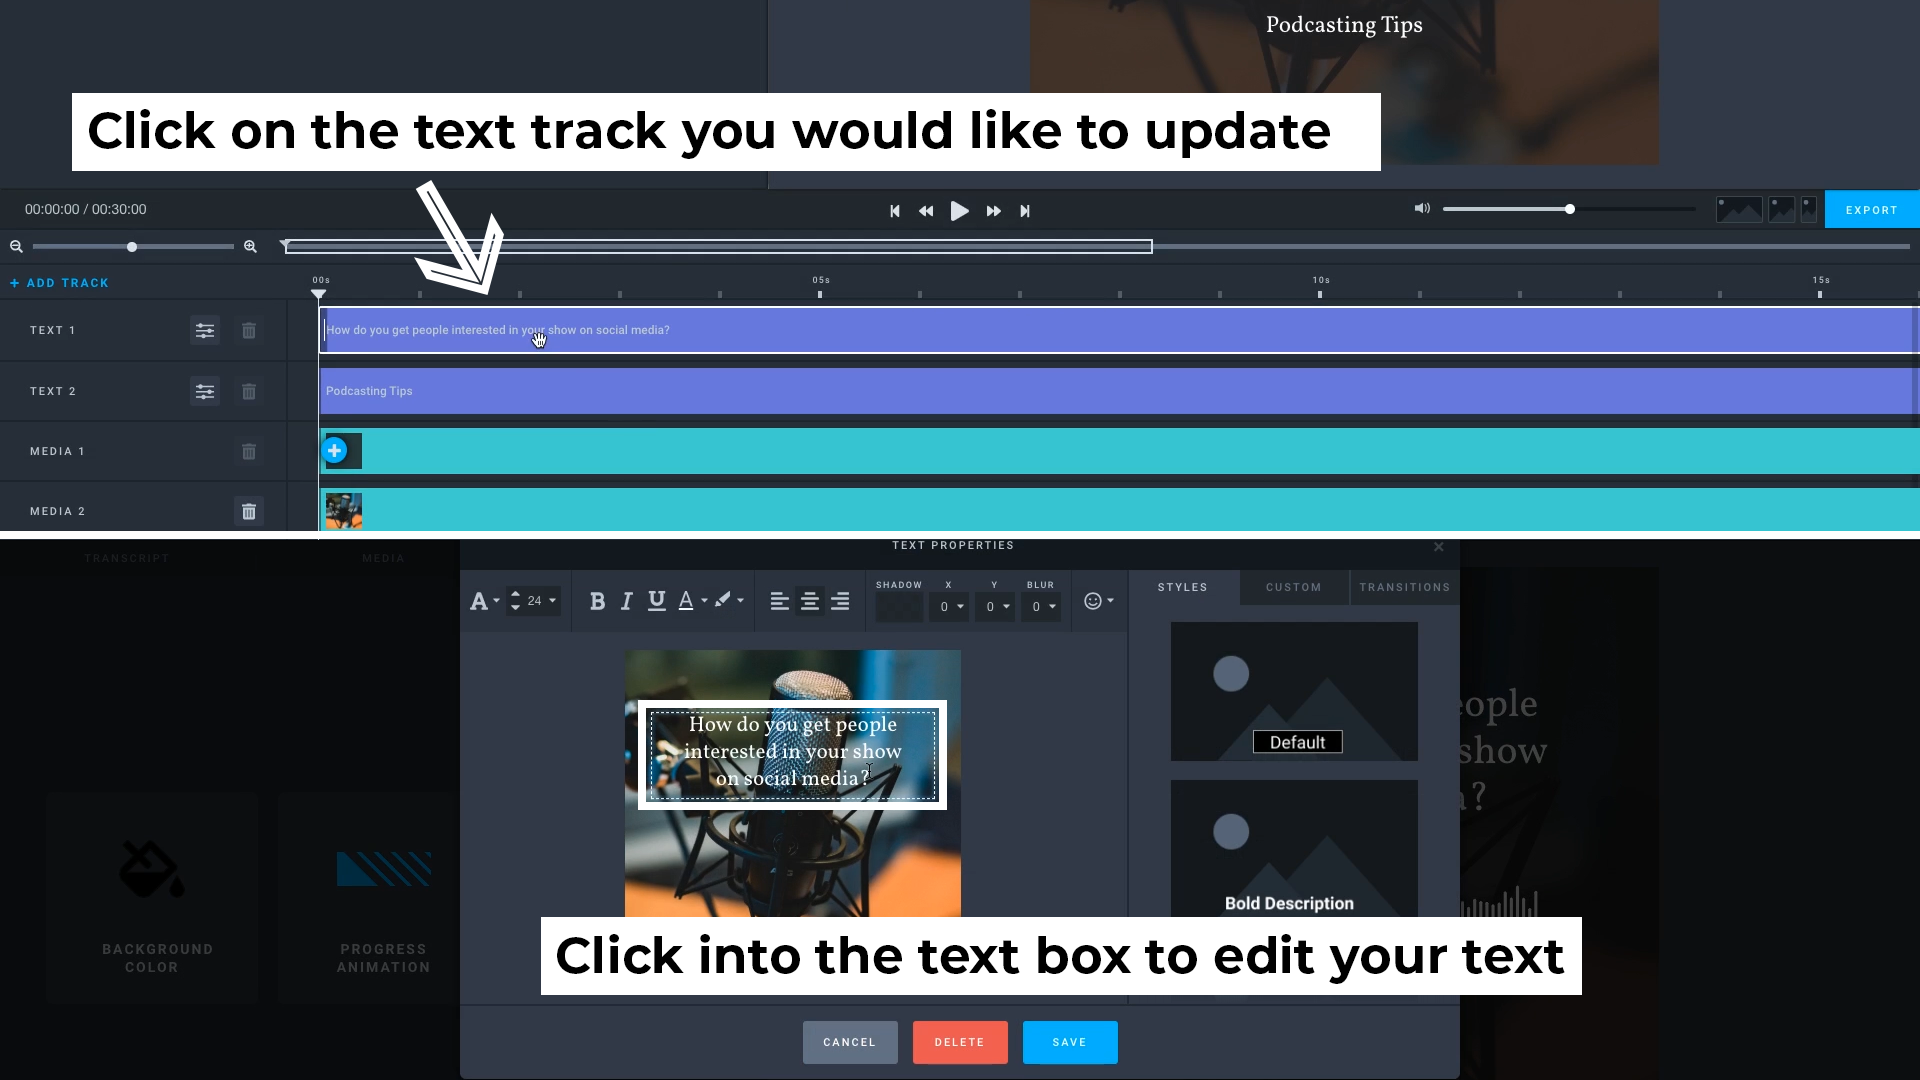
If the template you're working in has text, you may need to update it by clicking on the individual text boxes and customizing the content/appearance of your text box from the text properties window.
Step 4: Retime Assets

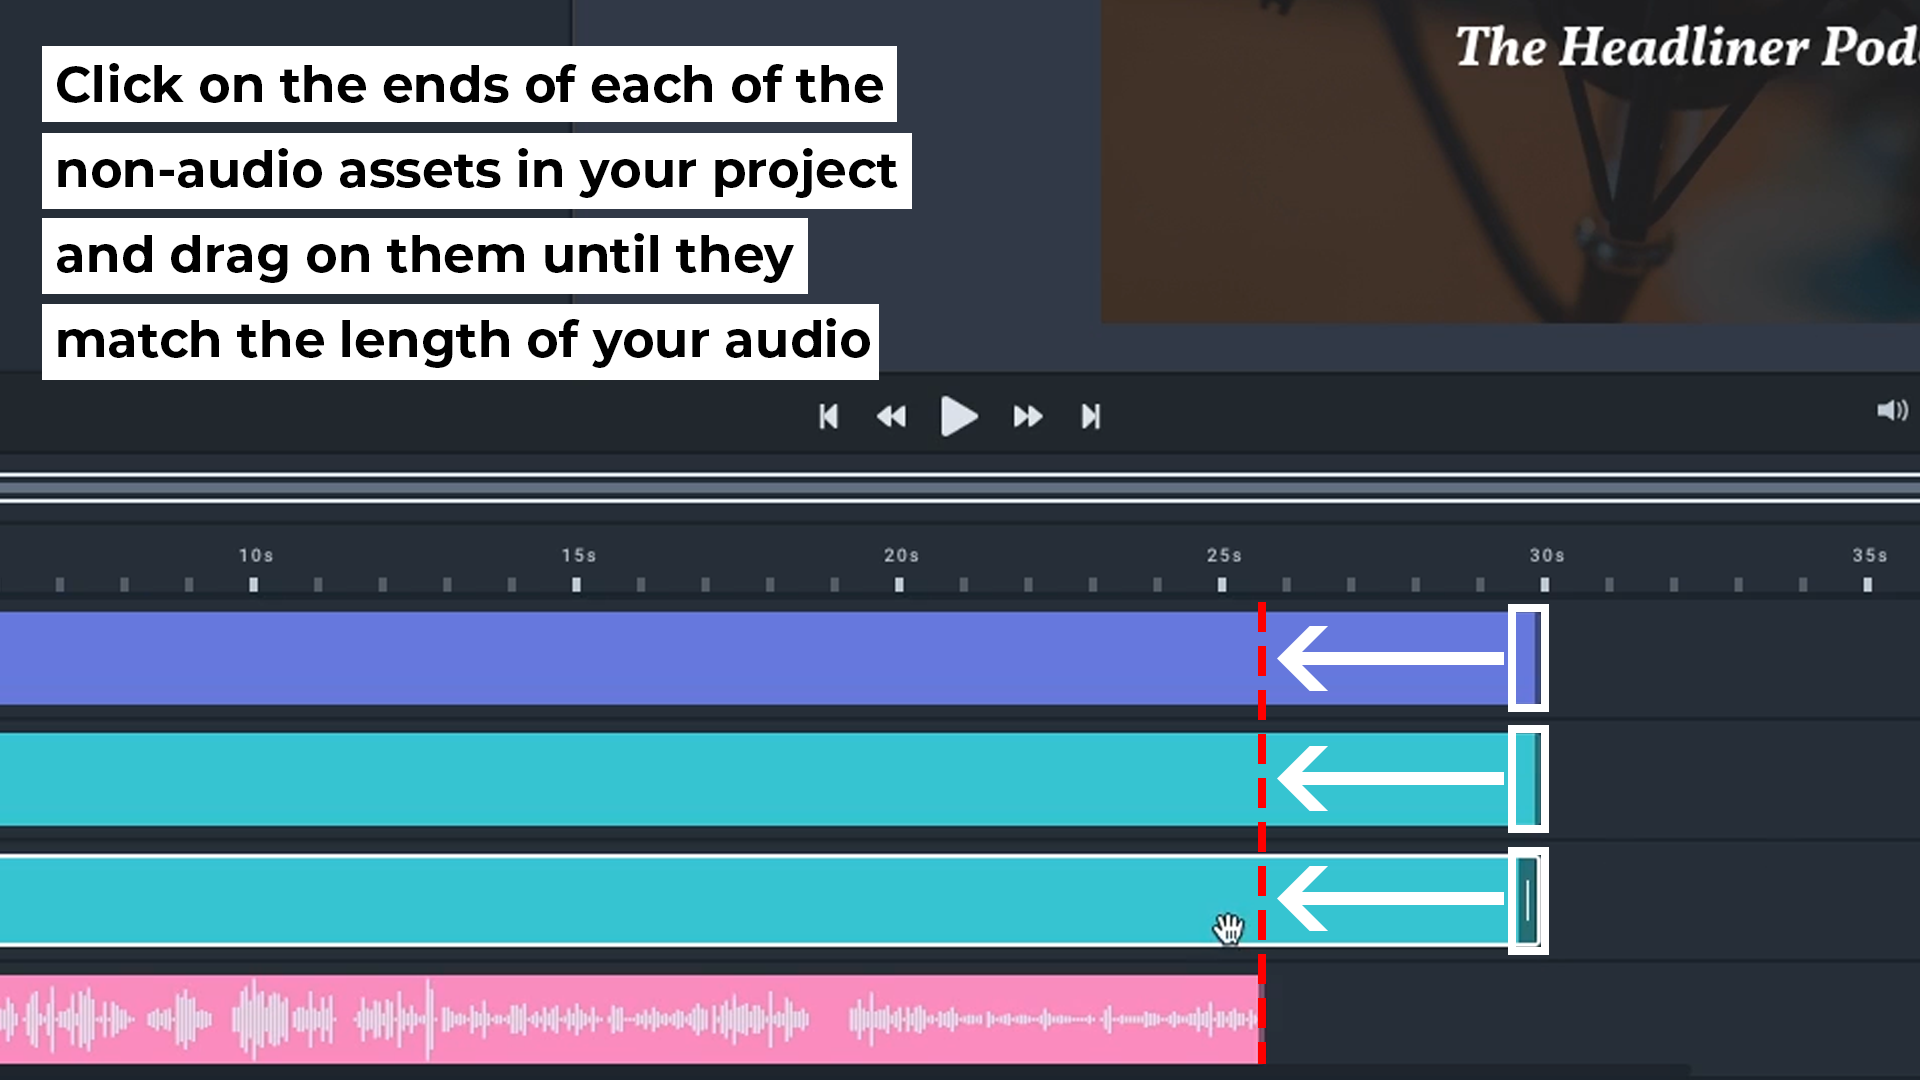
The last step in using a template in Headliner is retiming your text/images to match the duration of your audio. You can do this by clicking on the end of your assets and dragging them until they're lined up with your projects audio.

